Best Mushroom for Beginners to Grow
Starting your mushroom growing journey? Dr. MycoTek recommends the best species for your skill level, budget, and space — and walks you through your first grow from start to finish.
No credit card required · Free forever tier
Or jump into the live tools
© pintail (iNaturalist, cc-by)
Why Blue Oyster Is the Best Mushroom for Beginners
Blue oyster mushroom (Pleurotus ostreatus var. columbinus) earns the top beginner recommendation for multiple compelling reasons. It tolerates the widest temperature range of any gourmet species — fruiting reliably from 10 to 24 degrees Celsius (50 to 75 degrees Fahrenheit), which covers most indoor environments year-round. It colonizes substrate faster than any other commonly grown species, often completing colonization in 10 to 14 days on grain. It fruits aggressively and forgivingly, producing mushrooms even in imperfect conditions that would stall other species. It grows on almost any organic substrate — straw, sawdust, coffee grounds, cardboard, paper, cotton, even old books. And it produces large, visually satisfying harvests that reward new growers and build confidence for advancing to more demanding species.
Beginner Species Comparison Chart
Beyond blue oyster, several species are accessible to beginners, each with different strengths. Pink oyster (Pleurotus djamor) is nearly as easy as blue oyster but requires warm temperatures above 18 degrees Celsius (65 degrees Fahrenheit) — it grows explosively fast, going from pins to harvest in 4 to 5 days, but aborts instantly in cold drafts. Pearl oyster (Pleurotus ostreatus) is the classic temperate species with a mild flavour, performing best at 15 to 24 degrees Celsius. Lion's mane (Hericium erinaceus) is a beginner-viable species from a grow kit but requires sustained 90 to 95 percent humidity that is difficult to maintain without a dedicated chamber. Shiitake (Lentinula edodes) is not recommended for true beginners — its browning stage and cold shock requirement add complexity that causes frustration. King oyster (Pleurotus eryngii) requires cool temperatures at 12 to 16 degrees Celsius and specific technique (top-fruiting, casing layer) that makes it an intermediate species.
The Easiest Starting Method: Ready-to-Fruit Grow Kits
For an absolute first grow, a ready-to-fruit grow kit eliminates the most failure-prone steps — sterilization, inoculation, and colonization — and lets you focus solely on the fruiting stage. A quality grow kit arrives as a fully colonized substrate block (usually 2 to 2.5 kilograms of supplemented sawdust) sealed in a bag. You simply cut an X-shaped opening in the bag, place the kit in a spot with indirect light, and maintain humidity by misting 2 to 3 times daily or creating a humidity tent from a perforated plastic bag. Most blue oyster grow kits produce visible pins within 5 to 10 days and harvestable mushrooms within 10 to 14 days. A single kit typically costs $25 to $40 and produces 500 to 1000 grams of fresh mushrooms across 2 to 3 flushes — making it significantly cheaper per gram than store-bought gourmet mushrooms.
Your First Week: What to Expect
Day 1 to 2 after cutting the bag open, nothing visible will happen — the mycelium is adjusting to the new exposure to fresh air, light, and the change in gas exchange. Days 3 to 5, you may notice the mycelium at the cut edges becoming slightly bumpy or knotted — these are the very earliest primordia forming. Days 5 to 7, tiny pin clusters become visible, looking like small grey or blue-grey bumps. Days 7 to 10, the pins elongate rapidly, and you can see distinct stem and cap formation. Days 10 to 14, the mushrooms reach harvest size — caps should be still slightly curled downward at the edges. Blue oyster mushrooms can grow several centimetres per day during peak development, so check them morning and evening once caps begin forming. If nothing has happened by day 10, review your humidity (most common issue), temperature, and FAE conditions.
Level Two: Bucket Tek With Straw
After a successful grow kit, the natural progression is bucket tek — growing oyster mushrooms in a 5-gallon bucket filled with pasteurized straw and grain spawn. This method requires no pressure cooker, no sterile technique, and costs roughly $15 to $25 in materials to produce 1 to 2 kilograms of mushrooms. Here is the process: pasteurize chopped straw by soaking it in water at 65 to 82 degrees Celsius (150 to 180 degrees Fahrenheit) for 1 to 2 hours (a large cooler filled with hot water works well). Drain and cool the straw to below 27 degrees Celsius. Drill 12 to 16 holes (1 centimetre diameter) around the sides and bottom of a clean 5-gallon bucket. Layer the straw and grain spawn in the bucket — roughly 3 to 4 layers of straw with grain spawn scattered between each layer at a 10 to 15 percent spawn rate by volume. Cover the top loosely and store in a warm, dark area (21 to 24 degrees Celsius) for 2 to 3 weeks until the mycelium has colonized the straw. Then move it to a spot with indirect light and higher humidity — mushrooms will fruit from the drilled holes.
Level Three: Supplemented Sawdust Bags
Once you have mastered grow kits and bucket tek, supplemented sawdust bags are the next advancement. This method requires a pressure cooker (or autoclave) and produces the highest yields for nearly every gourmet species. The standard recipe is Masters Mix: 50 percent hardwood fuel pellets and 50 percent soy hull pellets by dry weight, plus 2 to 3 percent gypsum, hydrated to 60 to 65 percent moisture content. Load the mixed substrate into autoclavable bags with filter patches, sterilize at 15 PSI for 2.5 hours, cool overnight in a clean area, then inoculate with grain spawn at a 10 percent rate through a small opening in the bag. Seal and incubate at 24 to 27 degrees Celsius until fully colonized. This method gives you control over every variable and works for oyster, lion's mane, shiitake, king oyster, pioppino, and dozens of other species.
Common Beginner Mistakes to Avoid
The five most common beginner mistakes are: not maintaining adequate humidity (the number one cause of failed first grows — invest in a $15 hygrometer and a fine-mist spray bottle at minimum), cutting bag openings too small (make generous 5 to 8 centimetre openings that give mushrooms room to develop and allow fresh air exchange), placing grows in direct sunlight (mushrooms need indirect light only — direct sun overheats and dries them out), giving up after the first flush (soak the block in cold water for 8 to 12 hours after harvest to trigger second and third flushes that can produce 40 to 60 percent more total yield), and choosing the wrong species for their environment (blue oyster for cool spaces, pink oyster for warm spaces — not the reverse). Avoiding these mistakes dramatically improves your chances of a rewarding first grow.
Building Your Skills: The Beginner Progression Path
Mushroom cultivation has a natural skill progression that builds confidence at each stage. Start with a blue oyster grow kit (learn fruiting conditions). Move to bucket tek with straw (learn substrate preparation and pasteurization). Try supplemented sawdust bags (learn sterilization and inoculation). Experiment with different species (lion's mane, shiitake, king oyster — each teaches new techniques). Learn agar work and grain-to-grain transfers (learn mycology lab technique and strain selection). Eventually, try cloning wild mushrooms to agar and working with liquid cultures. Each step adds one or two new skills while building on everything you have already learned. The journey from opening your first grow kit to running a productive home mycology lab typically takes 6 to 12 months of active growing.
What You Get
See It In Action
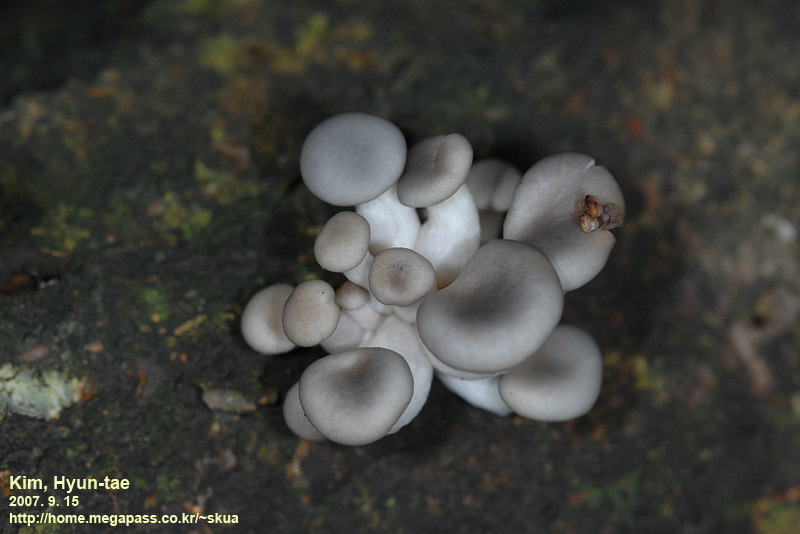
Real photos from the community
Curated commercial-license observations from Mushroom Observer.


Frequently Asked Questions
Related Topics
Ready to Get Expert Help?
Dr. MycoTek is free to start. No credit card required.
Trained on 12 million words of real grower knowledge. 80+ species. 4,400+ reference photos.
No credit card required · Free forever tier